Painting a bowling ball is a fun creative project and great idea that allows individuals to personalize their favorite pastime equipment. With a few simple steps, anyone can transform an ordinary bowling ball into a stunning piece of art that showcases their personality and style.
To paint a bowling ball, it’s crucial to choose the right materials and follow a proper technique to ensure long-lasting, vibrant results.
This article will guide you through the process of selecting paints specifically designed for bowling balls, preparing the surface, and applying the desired designs, patterns, or other colors.
As you embark on this artistic venture, remember that each step plays a crucial role in the project’ final outcome.
Patience and attention to detail will be your allies in transforming your bowling ball project into a colorful and unique throw back masterpiece that will grab everyone’s attention at the bowling alley.
Types of Paint for Bowling Balls
Acrylic Paints
Acrylic paint is a popular choice for painting bowling balls due to its versatility and ease of use. This type of paint dries quickly and adheres well to the surface of the ball.
Acrylics come in various finishes, such as matte, satin, and glossy, allowing for a range of design aesthetics.
They two coats are also water-resistant after drying, making them suitable for use on a bowling ball. One potential downside of acrylic paint is its tendency to chip over time, especially if the ball is used frequently.
Oil-Based Paint
Oil-based paint is another option for painting bowling balls.
This type of paint generally provides a glossy finish and can be more durable than acrylics. However, oil-based paint takes longer to dry, sometimes requiring several days to fully cure. Additionally, oil-based paint often contains harmful chemicals and may have a strong odor.
Latex-Based Paint
Latex-based paint can be an alternative material for painting bowling balls. This type of paint offers a variety of finishes, including matte, satin, and glossy.
Latex-based paint is known for being more eco-friendly than its oil-based counterpart, as it typically contains fewer harmful chemicals. It also dries quicker than oil-based paint. However, latex-based, paint bowling balls may not adhere as well to bowling balls and may be more susceptible to chipping.
Water-Based Paint
Water-based paint is another option for painting bowling balls. This paint type is often considered more environmentally friendly, as it contains fewer harmful chemicals and emits a bit less odor compared to oil-based paint.
Water-based paint dries quickly and can be cleaned up easily with soap and water. However, this type of paint may not be as durable as other options and might be more prone to chipping or fading over time.
Preparing the Bowling Ball
Sanding
Before painting the bowling ball, you will need to sand the surface to create a smooth, shiny, even texture.
Start with a coarse grit sandpaper (around 120 grit) and work your way up to a finer grit of paper (around 600 grit) for optimal results. Be sure to sand the entire surface of the ball, including the area around the finger holes.
After sanding, wipe the ball down with a clean, damp cloth to remove any dust, dirt or debris.
Masking Tape
Next, apply masking tape to protect the finger holes and the core of the ball from any potential damage during the painting process. This step is crucial, as it helps to maintain the integrity of the new ball itself’s spin and overall performance.
Make sure to cover the entire inner surface of the finger holes with tape, pressing it down firmly to create a secure barrier against paint, primer, and adhesive.
Applying Primer
To ensure proper paint adhesion, you must apply a layer of primer to the entire surface of the ball. Choose a primer specifically made for bowling balls, as these will provide the best bonding results.
Use a brush or spray can to apply the primer, and let it dry according to the manufacturer’s instructions. This may take anywhere from a matter of a few hours to a full day, depending on the product used.
| Type of Primer | Drying Time |
|---|---|
| Aerosol Spray Primer | 1-2 hours |
| Brush-On Primer | 3-4 hours |
Applying Adhesive
Once the primer has dried, it’s time to apply a suitable spray adhesive top layer that will help to bond the paint to the ball’s surface.
This is an essential step to finished painting, as it ensures that the paint remains durable and long-lasting. Use a brush or sponge applicator to apply a thin, even layer of adhesive, making sure not to miss any spots. Allow the adhesive to dry according to its instructions before proceeding with the painting process.
- Choose an adhesive created specifically for bowling ball applications.
- Follow the manufacturer’s guidelines for drying times and application methods.
- Consider using a heat gun or hairdryer to speed up the adhesive drying process, but only if recommended by the manufacturer.
Painting Process
Applying Colors
When painting a bowling ball, the first step is choosing the colors. Acrylic paints are often recommended because they adhere well to the ball’s surface and offer a wide range of vibrant colors.
To apply the paint, it’s essential to clean the bowling ball with rubbing alcohol or a similar solution before starting. This helps the wet paint adhere smoothly.
Begin by applying the base color using a paintbrush or sponge to ensure even coverage. Allow the paint to dry thoroughly before proceeding.
Drying time may vary depending on the paint, humidity, and temperature. Refer to the specific instructions provided with the paint for drying times.
Creating Intricate Designs
Creating intricate designs on a bowling ball can be both challenging and rewarding. Using stencils or painter’s tape, map out the desired design on the ball.
Paint the details by hand, using a fine brush or a tool designed for precision painting. Remember to work in sections, allowing each part of the design to dry before moving to the next. This helps prevent smudging or blurring of the colors.
Some tips for intricate designs include:
- Sketch the design on paper beforehand to plan and make revisions
- Utilize painter’s tape to create clean lines and sharp edges
- Use a fine-tipped paintbrush or other tools for precision painting
Adding a Clear Coat
After the paint has been sprayed and dried and the designs are complete, the final step is applying a clear coat to the bowling ball.
This step helps protect the paint and keep the design looking fresh and vibrant over time. The clear coat can be either an acrylic sealant or a polyurethane product, depending on personal preference and compatibility with the chosen paint.
To apply the clear coat:
- Shake or stir the clear coat product well before use
- Apply a thin, even layer over the entire surface of the bowling ball
- Allow the clear coat to dry according to the manufacturer’s instructions
- If desired, apply additional layers for added protection
Remember to keep the center of the ball resting securely during the entire painting process, using a bowling ball cup or bowl or other stabilizing apparatus to prevent it from rolling or shifting. After the clear-coating process is complete, the ball may require a final baking or curing step. Consult the specific instructions for the selected paint and clear coat products to ensure proper curing and adhesion.
Safety and Precautions
Well-Ventilated Area
It is essential to work in a well-ventilated area when painting a bowling ball. This helps to reduce the inhalation of potentially harmful fumes from the paint and solvents. Open windows and doors to enable proper air circulation. If possible, use an exhaust fan to further improve ventilation.
Protective Gear
Wearing appropriate protective gear is crucial for personal safety during the painting process. Use gloves to protect the hands from coming into contact with paint and solvents, which can cause skin irritation. Wear a mask to prevent inhalation of fumes and dust particles. Protective eyewear is also recommended to shield the eyes from any paint splashes or particles.
Proper Drying Time
Allowing adequate drying time is vital for both safety and the quality of the final result. Observe the recommended drying time listed on the paint container. Ensuring proper drying time will not only produce a smooth and even finish but also help to prevent any accidents from handling the ball before it is completely dry. Patience is key to achieving the desired outcome.
Keep in mind the following points to ensure a safe painting experience:
- Ensure the area is well-ventilated.
- Wear gloves, masks, and protective eyewear.
- Allow for proper drying time.
Competing with a Painted Bowling Ball
When competing with a painted bowling ball, there are a few factors to consider to ensure optimal performance and adherence to rules and regulations.
First and foremost, it is most important thing is to check the guidelines and regulations of the specific bowling leagues or tournaments in which one plans to participate. Some organizations may have restrictions on the customization of bowling balls, including paint and other decorative modifications. Ensure compliance with the rules to avoid disqualification or other penalties.
In addition, the choice of paint used for the bowling ball can significantly impact its performance. Some paints may alter the traction and friction between the ball and the lane, which could affect its spin, speed, and overall precision. To maintain competitive play, opt for paints specifically designed for use on bowling balls. These paints will provide an aesthetically pleasing finish without sacrificing function.
Here are a few points to consider when selecting a paint job for your bowling ball:
- Choose a paint that adheres well and is resistant to chipping, peeling, or fading over time, as these issues can impact consistency during play.
- Opt for paint types that are less likely to alter the ball’s weight or balance. A well-painted ball should maintain its original weight specifications within acceptable variances established by bowling regulatory bodies.
- Consider the drying time and durability of the paint to ensure that it will not wear off during the competition.
Finally, it is essential to practice with the painted bowling ball before entering any competitions. This allows you to become accustomed to any possible differences in the ball’s performance due to the paint, such as changes in grip, hook potential, or lane conditions. Regular practice sessions with the painted ball will increase your comfort and confidence during official play.
Painting for Aesthetic Purposes
Gazing Ball
A gazing ball is a decorative sphere often used in gardens, lawns, and other outdoor spaces. It can also be used as garden furniture or as a unique centerpiece for a bowling ball collection. To paint a bowling ball as a gazing ball, first, clean the surface thoroughly with soap and water, then sand it gently to remove any wax or oils that may be present.
Prepare your desired paint colors, such as cadet blue, gray, white paint or burnt sienna, and select a suitable base coat. Apply the base coat evenly and allow it to dry thoroughly before adding any additional layers or designs. It is important to use paint specifically designed for bowling balls, such as acrylic or enamel paint, to ensure long-lasting and durable results.
To create a more realistic gazing-ball effect, consider incorporating different patterns or textures, such as marbling or stippling techniques, to achieve a unique appearance.
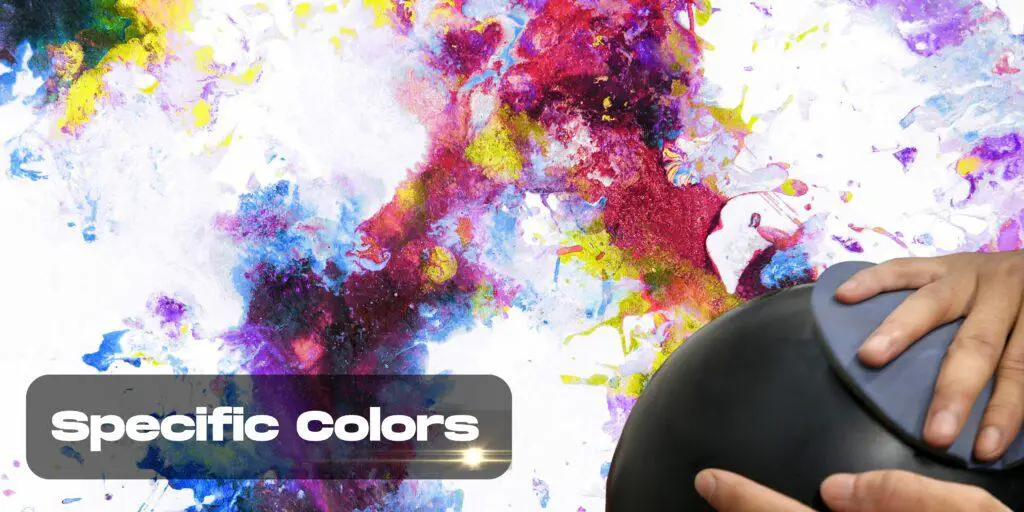
Specific Colors
When choosing specific colors for your bowling ball, it is essential to consider both personal preference and the intended purpose of the ball. For example, a common color combination for a gazing ball might include shades of cadet blue and gray. However, if you are simply looking to enhance the visual appeal of your bowling ball for gameplay, you might opt for more vibrant colors or contrasting patterns to make the ball stand out.
Below are the steps to paint a bowling ball using specific colors such as burnt sienna, cadet blue, and gray:
- Choose the desired colors and appropriate paint types (acrylic, enamel, etc.)
- Prepare the surface by cleaning and sanding the bowling ball
- Apply a primer, if necessary, and allow it to dry completely
- Paint the bowling ball using your selected colors, applying each color in a controlled, even manner
- Allow each layer of paint to dry before applying additional layers or designs
- Once the final design is complete, seal the surface with a clear coat or protective finish to ensure longevity and durability
In summary, customize your bowling ball by painting it for aesthetic purposes. Consider creating a gazing ball design or using specific colors like burnt sienna, cadet blue, or gray to achieve a unique and eye-catching appearance for used bowling balls. Proper surface preparation and using the correct paint types will ensure a long-lasting, visually appealing result.
Finishing and Care
Using a Release Agent
Before applying the final coat of paint, it’s important to use a release agent. This will ensure that the paint adheres properly to the bowling ball’s surface and creates a smooth finish.
Release agents can be purchased at most hardware stores, and they should be applied according to the manufacturer’s instructions. Typically, the release agent should be applied evenly over the entire surface of the ball, allowing it to dry for the recommended amount of time before proceeding with the paint application.
Applying a Polyurethane Coat
Once the release agent has been applied and dried, a polyurethane coat should be applied to the bowling ball’s surface. This will provide a protective layer for the paint and maintain the ball’s appearance. Choose a high-quality polyurethane, preferably one designed specifically for use on bowling balls.
- This can be done using a brush or spray can, applying an even coat over the entire surface.
- Allow the polyurethane to dry for the recommended amount of time, typically 24 hours.
- After the polyurethane is completely dry, lightly sand the surface using a fine-grit sandpaper (600 grit or higher) to smooth any rough areas.
- Apply a second coat of polyurethane, again allowing it to dry for the recommended amount of time.
- Repeat the sanding process after the second coat has dried.
Ball Resurfacing
Over time, the surface of your bowling ball may wear down due to normal use. Ball resurfacing is an essential part of maintaining your bowling ball’s performance and appearance. To resurface your ball:
- Begin by using a low-grit sandpaper (such as 180 or 320 grit) to remove any visible scratches or imperfections.
- Gradually increase the grit of the sandpaper, working in a circular motion around the entire ball. As you move to higher gritsandpapers, the surface should become smoother.
- After sanding the ball using the highest grit sandpaper, clean the ball thoroughly with a microfiber towel to remove any lingering dust or debris.
- Apply a polishing compound, working it into the surface of the ball using a clean microfiber cloth. This will help restore the ball’s shine.
- Finally, apply a thin layer of ball wax or polish to protect the surface and maintain its appearance.
By following these steps, your painted bowling ball will retain its striking look and continue to perform well on the lanes.