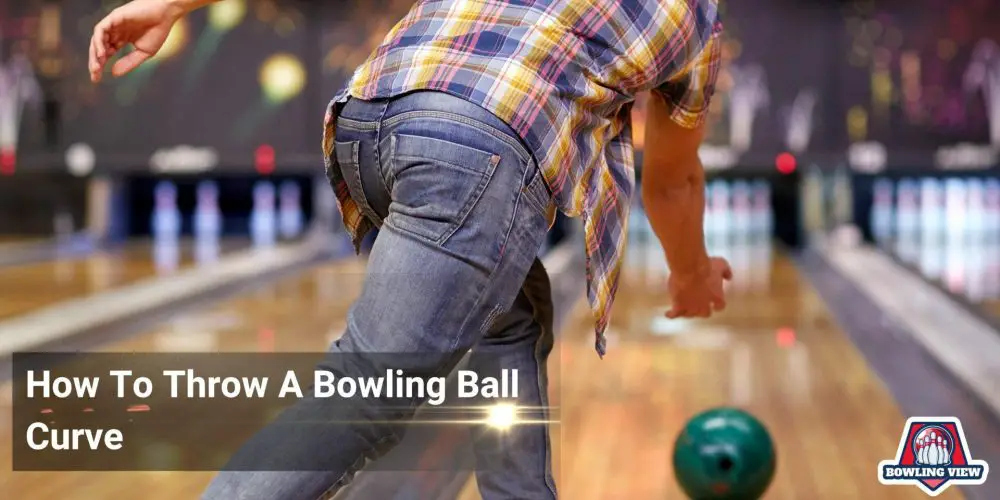
How To Throw A Bowling Ball Curve? Throwing a bowling ball with a curve, also known as “hooking” the ball, is a technique many bowlers use to improve their scores and increase their chances of getting strikes. Mastering the art of curving a bowling ball can significantly enhance a player’s game and pave the way for competitive success. In this guide, we will explore how to throw a bowling ball curve.
Firstly, it is important to understand the physics behind a curving bowling ball. The combination of the ball’s velocity, rotation, and interaction with the lane surface generates a force that propels the ball towards the pins in a curved motion. Developing the skill to control this motion consistently can be challenging but highly rewarding for bowlers of all levels.
Before attempting to throw a curve, bowlers should also consider their equipment. Choosing a suitable bowling ball with the right coverstock material and core design can greatly impact the ability to generate a consistent and effective hook. Similarly, Familiarity with the lane conditions, such as the oil pattern, is another essential aspect to consider when learning how to throw a bowling ball curve.
The Fundamentals
Understanding how to throw a bowling ball curve requires mastering some fundamental skills and techniques.
Proper Grip
First and foremost, a successful bowling ball curve begins with the proper grip. For beginners, a fingertip grip is recommended as it provides more control and accuracy. To achieve this, insert your thumb fully into the thumb hole, and place your middle and ring fingers in the finger holes up to the first knuckle. This grip results in less surface contact with the bowling ball, allowing for a more controlled release.
Controlled Swing
Next, Developing a controlled swing is crucial to executing a curve. Start by taking a comfortable stance at the beginning of the lane, facing the pins. Hold the bowling ball with your dominant hand, keeping your wrist straight and elbow tucked in.
Furthermore, Initiate the swing by pushing the ball outward and letting it fall naturally into the backswing. An effective backswing should be smooth, with a consistent speed from start to finish. Keep in mind that the swing arc height should be maintained at around hip level.
Read More About> How To Hold A Bowling Ball
Aim
Aiming is key to achieving accuracy when throwing a bowling ball curve. Instead of targeting the individual pins, focus on the arrows located on the lane about 15 feet down from the foul line. Beginners should aim for the second arrow from the side they’re bowling from (e.g., right-handed bowlers should aim for the second arrow from the right). This technique ensures that you consistently hit the pocket, increasing your chances of a successful curve.
Release
The final and most crucial step in throwing a curve is the release. As you approach the foul line during your swing, rotate your hand and wrist so that your fingers lift the bowling ball and create a desired rotation.
For a standard curve, rotate your fingers from a 4 o’clock position to a 7 o’clock position (for right-handed bowlers) or 8 o’clock to 5 o’clock (for left-handed bowlers).

Finally, avoid “snapping” your wrist, as a fluid motion will result in a better curve and reduced risk of injury.
Understanding Bowling Ball Types
Choosing the Right Weight
Selecting the appropriate weight for a bowling ball is crucial for achieving a good curve. While house balls are available, finding one that fits properly and provides the desired weight might be challenging. To determine the correct weight, consider the following factors:
- Strength: Choose a ball that is easy for you to handle without straining or losing control.
- Comfort: A well-fitted ball should allow the fingers and thumb to slide in and out easily without any discomfort.
- Control: Ensure the selected weight allows you to maintain control over the ball during the entire approach and release.
Material Differences
For instance, there are three primary materials used in bowling ball construction, each affecting the spin and interaction with the lane oil differently.There are three primary materials used in bowling ball construction, each affecting the spin and interaction with the lane oil differently.
- Plastic Ball: These entry-level balls are the least expensive and have a smooth, plastic coverstock. Primarily used by beginners, plastic bowling balls offer minimal hook potential, making them unsuitable for players seeking a pronounced curve.
- Urethane: Compared to plastic balls, urethane coverstocks provide a moderate grip on the lane and have more hook potential. Urethane balls are suitable for those looking to develop a gentle curve in their shots.
- Reactive Resin: Offering the greatest hook potential, reactive resin balls have a different coating that reacts more aggressively to the lane oil. As a result, these balls offer an increased spin rate and more curve potential for advanced players aiming to master the art of the bowling ball curve.
In conclusion, understanding the different types of bowling balls, their materials, and how they affect the curve is essential for choosing the right one. By selecting the appropriate weight and material, bowlers can improve their performance and develop an effective bowling ball curve.
Bowling Ball Curve Techniques
Hook Shot
The hook shot is a popular technique that many professional bowlers use to achieve a greater number of strikes. To execute a hook shot, a bowler must choose the appropriate grip, such as the conventional grip, semi-fingertip grip, or the fingertip grip. The conventional grip allows for more control, while the semi-fingertip and fingertip grips provide additional hook potential.
When throwing a hook shot, the bowler should focus on maintaining a smooth, continuous arm swing. The ideal arm swing begins by extending the bowling arm down and away from the body, followed by a fluid upward movement to create momentum. As the ball reaches the top of the swing, the bowler’s thumb releases, and the fingers continue rotating the ball, creating friction with the bowling lane. This friction causes the ball to hook towards the pins, increasing the chances of a strike.
Curve Ball
The curve ball is another bowling technique designed to increase the likelihood of knocking down more pins. Similar to the hook shot, the curve ball relies on generating friction with the bowling lane. However, the curve ball focuses more on spin and trajectory than the sudden change in direction found in the hook shot.
To throw a curve ball, a bowler must first select their grip. The fingertip grip is often preferred for this technique, as it allows for greater control of the ball’s release. When executing a curve ball, a bowler should concentrate on creating a smooth, relaxed arm swing. Unlike the hook shot, the curve ball’s arm swing should be more rounded, with the goal of maintaining proper trajectory and spin throughout the throw.
As the ball reaches the top of the swing, the bowler releases it, allowing the fingers to generate the necessary spin. The ball then travels with a gradual, curving motion down the bowling lane, eventually reaching the pins at an optimal angle for increased pin action and higher strike potential.
Improving Your Skills
Consistently, improving your ability to throw a bowling ball curve takes regular practice and attention to various aspects of your technique.
Practice Strategies
To get better at throwing a curve in bowling, it’s essential to practice consistently. Start by Then, focus on your grip, ensuring that your thumb is fully in the hole and your fingers are inserted just up to the second joint. Then, maintain a relaxed grasp and a handshake position throughout the entire approach and release.
Next, work on developing a smooth arm swing. Keep your wrist straight during the backswing and follow through to create a more consistent hook. Incorporating wrist support can assist in maintaining the proper alignment and movement throughout the throw.
Finally, make sure to practice your follow-through by extending your arm in the direction you want the ball to go, as this helps improve accuracy and consistency. Practicing these techniques will eventually lead to more strikes and better overall performance.
Adjusting for Lane Conditions
Understanding and adapting to varying lane conditions is a critical aspect of mastering the curve in bowling. Many factors can affect how your ball reacts on the lanes, so it’s important to observe the behavior of your throws and make necessary adjustments.
- House ball: If you’re using a house ball, you may find it challenging to generate a significant hook. Consider trying a lighter ball or investing in your own to gain more control over your throws.
- Aiming: Pay attention to the oil patterns on the lane, as this will affect the ball’s movement. To increase your chances of hitting the pocket, aim for the “breakpoint,” where the oiled and dry areas meet, allowing the ball to curve into the sweet spot.
- Hooking: When you notice a lack of hook, experiment with applying more counter-clockwise rotation on the release. This will generate more curve and help you adjust to the specific lane conditions you’re facing.
By practicing regularly and adapting to different lane conditions, you can improve your ability to consistently throw a successful bowling ball curve.
Additional Tips and Tricks
Footwork and Timing
When it comes to Footwork and timing play a crucial role in perfecting curve bowling. For example, To achieve a consistent and accurate swing, start your approach with a slow and calculated motion. Focus on maintaining balance and stability throughout each step.
- Take small steps to maintain a steady pace.
- Concentrate on the lateral movement of the foot for a smooth slide.
A proper release point is also critical for a successful curve. The ideal release point depends on the individual’s approach, ball weight, and target arrow. Experiment with different release points and find the one that works best for you.
Advanced Hand Positions
Mastering advanced hand positions can lead to more control over the degree of your curve. Similar to spiraling a football, applying the right pressure and hand movement contributes to the efficient spin required for curving a bowling ball. Some useful tips include:
- Rotate your fingers around the ball, as opposed to lifting it.
- Experiment with different wrist positions to find the optimal orientation for your style.
- Focus on the arrow and the intended trajectory while keeping a relaxed grip.
Utilizing these tips and tricks, along with regular practice, will help you improve your curve bowling skills and increase your competitive edge in leagues and tournaments. Remember to continuously seek guidance from experienced bowlers to enhance your understanding of the techniques and strategies used in the sport.
Common Challenges and Solutions
Optimizing Your Grip
One common challenge faced by bowlers when trying to throw a curveball is achieving the optimal grip. There are various grips to consider, such as the conventional grip, the fingertip grip, and the semi-fingertip grip. The most effective grip for throwing a curveball is the fingertip grip. This grip provides better control and spin, while also reducing the strain on the hand.
To use the fingertip grip, the bowler must place his or her fingers in the following positions:
- Thumb: Fully inserted into the thumbhole
- Ring and Middle Fingers: Inserted up to the first knuckle
By maintaining the right grip, the bowler can release the bowling ball with a smooth motion, allowing the ball to curve and create the desired spin. Proper footwork and follow-through are also essential for executing an accurate swing.
Bouncing Back from Subpar Throws
Even the most skilled bowlers face the occasional subpar throw. Learning how to bounce back from these setbacks is vital to maintaining control and consistently achieving curveball strikes and spares.
When recovering from a subpar throw, consider the following steps:
- Analyze the throw: Identify the factors that led to the less-than-ideal result, such as a poor grip, improper footwork, or a weak follow-through.
- Adjust your technique: Based on the identified issues, make the necessary changes to improve your grip, footwork, or follow-through.
- Stay focused: It’s essential to stay calm and focused on the next throw rather than dwelling on past mistakes.
- Practice makes perfect: Devote time to practicing your curveball technique to improve your consistency and control over the spin.
In conclusion, Creating the perfect bowling ball curve takes practice and determination.
By focusing on these two key areas – optimizing grip and bouncing back from subpar throws – a bowler can steadily improve their skills and master the art of curveball bowling.
Related Articles:
Frequently Asked Questions
To throw a curve ball in bowling, you’ll need to use the spin technique. When holding your bowling ball, make sure that you keep your thumb and middle fingers in the holes of the ball at all times.
As you swing forward, release the ball with a counter-clockwise rotation using your wrist and throwing arm for added power. This will cause it to spin in midair before hitting the pins, creating a curving path toward them which can be difficult to predict or stop!
Yes, you can curve a house bowling ball with the spin technique. However, due to its heavier weight and lack of holes for your fingers, it can be more challenging to do so properly.
It’s best to practice this technique with lighter balls at first before trying it with a house bowling ball. With enough practice, you should have no difficulty curving your shots!
The technique where the bowling ball curves in its path is called a spin technique. The spin of the bowling ball on release from the fingers or thumb will cause it to rotate in midair before hitting the pins, creating a curving path toward them that can be difficult to predict or stop.
To curve a bowling ball with two fingers, you need to execute a spin technique. The idea is to release the ball by releasing your thumb and index finger into the “cup” of the bowling ball at the moment of impact, in such a way that it will rotate quickly as it leaves your hand.
To do this properly, you should aim for a low center of gravity and use an outside-in approach on your release angle; this will help create more rotation on the ball. Practice with lighter balls first before going up to heavier ones so you can get used to how much spin needs to be applied for it to properly curve in its path.
With enough practice, you should have no difficulty curving your shots!
To curve a perfect bowling ball, you should release your thumb and index finger into the “cup” of the bowling ball at the moment of impact, in such a way that it will rotate quickly as it leaves your hand.
Aim for a low center of gravity and use an outside-in approach on your release angle to create more rotation.
Practice with lighter balls first before going up to heavier ones so you can get used to how much spin needs to be applied for it to properly curve in its path. With enough practice, you should have no difficulty curving your shots!
The best way to curve a ball is to release your thumb and index finger into the “cup” of the bowling ball at the moment of impact, in such a way that it will rotate quickly as it leaves your hand.
Aim for a low center of gravity and use an outside-in approach on your release angle to create more rotation.
Practice with lighter balls first before going up to heavier ones so you can get used to how much spin needs to be applied for it to properly curve in its path.
To curve a perfect ball, you should start by aiming for a low center of gravity and using an outside-in approach on your release angle to create more rotation.
You should also make sure to release your thumb and index finger into the “cup” of the bowling ball at the moment of impact to give it maximum spin.
Additionally, practice with lighter balls before trying with heavier ones so that you can get used to how much spin needs to be applied for it to properly curve in its path. With enough practice, you should have no difficulty curving your shots!


